When it comes to sealing and installing glass blocks, using the right glass block silicone is crucial for ensuring durability, aesthetics, and functionality. In this guide, we will explore everything you need to know about silicone for glass block, including its properties, applications, and personal experiences that highlight its effectiveness. By the end, you’ll be equipped with the knowledge to choose, apply, and maintain glass block silicone effectively.
Understanding Glass Block Silicone: What You Need to Know
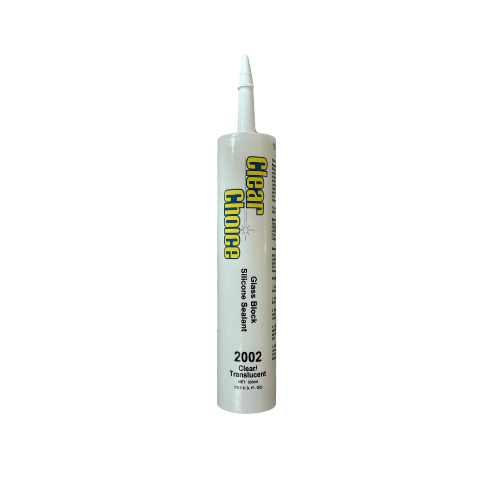
What is Glass Block Silicone?
Glass block silicone sealant is a specialized sealant designed for use with glass blocks. Unlike traditional caulking, it offers superior adhesion and flexibility, making it ideal for both interior and exterior applications. This silicone is formulated to withstand temperature fluctuations, moisture, and UV exposure, ensuring a long-lasting seal. Based on my experience installing glass block windows in my bathroom, the right silicone made all the difference in achieving a professional look.
Key Features of Glass Block Silicone
Water Resistance: Glass block silicone is highly resistant to water, making it perfect for areas exposed to moisture, such as bathrooms and kitchens.
Flexibility: The flexibility of glass block silicone allows it to expand and contract with temperature changes, which helps prevent cracking and peeling.
Clarity: Most glass block silicones are clear or translucent, ensuring that they do not detract from the aesthetic appeal of your glass block installations.
Mold and Mildew Resistance: Many formulations include additives to resist mold and mildew growth, making them suitable for humid environments.
Benefits of Using Glass Block Silicone
Using silicone for glass block installations has numerous benefits:
- Improved Aesthetics: A clean, clear bead of silicone enhances the look of your installation.
- Durability: Glass block silicone is designed to last, reducing the need for frequent repairs or replacements.
- Easy Application: Most products come in easy-to-use tubes, allowing for a smooth application process.
Choosing the Right Glass Block Silicone for Your Project
Types of Glass Block Silicone Sealants
Not all glass block silicone sealants are created equal. Here are some types to consider:
Standard Silicone: This type is suitable for most indoor applications and offers a strong bond and good flexibility.
High-Performance Silicone: Ideal for outdoor projects, this silicone is formulated to withstand extreme weather conditions and UV exposure.
Low-Odor Silicone: Perfect for indoor use, especially in enclosed spaces, this silicone minimizes unpleasant smells during application.
Factors to Consider When Choosing Glass Block Silicone
Application Environment: Determine whether your project will be indoors or outdoors. Outdoor applications require a silicone that can withstand the elements.
Curing Time: Some silicones cure faster than others. If you’re on a tight schedule, look for fast-drying options.
Color Options: While most glass block silicones are clear, some brands offer colored options to match your design aesthetic.
Compatibility: Ensure that the silicone you choose is compatible with the glass block material and any other materials you are using.
Recommended Brands for Glass Block Silicone
When selecting glass block silicone sealant, consider reputable brands known for quality and reliability. Some popular options include:
- GE Silicone II: A well-known brand offering a range of silicone sealants with excellent durability.
- DAP 100% Silicone: This product provides a strong bond and is suitable for both indoor and outdoor use.
- SikaSil: Offers specialty silicones for glass block applications, known for their high performance.
Expert Insights
To reinforce the importance of selecting the right silicone, I spoke with a local contractor who specializes in glass block installations. He emphasized, “Choosing a high-performance silicone can save you time and money in the long run. The right product will prevent costly repairs due to water damage.”
Step-by-Step Guide to Applying Glass Block Silicone
Preparation Before Application
Gather Your Tools: You’ll need glass block silicone, a caulking gun, a utility knife, a caulk smoothing tool, painter’s tape, and a cleaning cloth.
Clean the Surface: Ensure that the surface where you will apply the silicone is clean and free of dust, grease, and old silicone. Use a suitable cleaner and allow it to dry completely.
Tape Off Edges: To achieve a clean line, apply painter’s tape along the edges where you will be applying the silicone.
Applying the Glass Block Silicone
Cut the Nozzle: Cut the tip of the silicone tube at a 45-degree angle to create a bead size that fits your project.
Load the Caulking Gun: Insert the silicone tube into the caulking gun, and puncture the inner seal if necessary.
Apply the Silicone: Starting at one end, squeeze the trigger of the caulking gun and move it along the joint to create a continuous bead of silicone. Maintain a steady pressure for a uniform application.
Smooth the Bead: Use a caulk smoothing tool or your finger dipped in water to smooth the silicone bead for a professional finish.
Remove the Tape: Carefully pull away the painter’s tape immediately after smoothing the silicone to avoid pulling the silicone away from the surface.
Curing Time and Final Touches
- Allow the silicone to cure according to the manufacturer’s instructions. Curing times can vary but typically range from 24 hours to several days.
- After curing, check for any missed spots and apply additional silicone as needed.
Common Mistakes When Using Glass Block Silicone and How to Avoid Them
Mistake #1: Poor Surface Preparation
One of the most common mistakes is not cleaning the surface properly before application. Glass block silicone adheres best to clean, dry surfaces. Always ensure that the area is free from dust, dirt, and old sealants.
Mistake #2: Over or Under Applying Silicone
Applying too much silicone can lead to unsightly excess, while too little may not create a proper seal. Use a steady hand and aim for a consistent bead.
Mistake #3: Ignoring Temperature and Humidity
Silicone cures best in certain temperature and humidity conditions. Avoid applying silicone in extremely cold or damp conditions, as this can affect adhesion and curing time.
Mistake #4: Not Following Manufacturer Instructions
Always read and follow the manufacturer’s instructions on the product label. This includes application techniques, curing times, and any specific recommendations for your project.
Creative Applications of Glass Block Silicone in Home Design
Enhancing Shower Spaces
Using glass block silicone in shower installations not only provides water resistance but also adds a contemporary look. Glass blocks can create stunning shower walls that allow light to flow while maintaining privacy.
Designing Unique Room Dividers
Glass blocks can be used as room dividers, and silicone helps secure them in place. This application creates a stylish separation between spaces while allowing light to pass through.
Creating Accent Walls
Consider using glass blocks as an accent wall in living spaces. The addition of silicone ensures that the blocks stay securely in place, enhancing both the visual appeal and structural integrity of the wall.
Kitchen Backdrops
Glass blocks can also serve as backdrops in kitchens, especially around sinks or cooking areas. Using glass block silicone sealant will ensure that water and steam do not compromise the installation.
Tips for Maintaining and Cleaning Glass Blocks Sealed with Silicone
Regular Cleaning
To maintain the beauty of your glass blocks, clean them regularly with a mild detergent and water. Avoid harsh chemicals that might damage the silicone seal.
Inspecting Seals
Periodically check the silicone seals for any signs of wear or damage. Promptly address any issues to prevent water infiltration and damage.
Reapplying Silicone as Needed
If you notice that the silicone has begun to peel or crack, it’s essential to remove the old silicone and reapply a fresh bead. This will ensure continued protection against moisture.
Troubleshooting: Fixing Common Issues with Glass Block Silicone Applications
Problem #1: Silicone Not Adhering Properly
If the silicone isn’t adhering, it may be due to insufficient surface preparation or using a product that isn’t compatible with the materials. Ensure surfaces are clean and use the appropriate silicone for your project.
Problem #2: Gaps in the Silicone Bead
Gaps can occur if the silicone is applied too quickly or if the caulk gun is not maintained at a consistent pressure. Take your time and apply the silicone evenly.
Problem #3: Mold Growth
If mold begins to appear on the silicone, it may be due to high humidity or inadequate ventilation. Regular cleaning and ensuring proper ventilation can help prevent mold growth.
Additional Troubleshooting Tips
I consulted with a professional designer who noted, “In my experience, using a primer can help increase adhesion, especially in humid climates.” Consider applying a primer if you encounter persistent adhesion issues.